Steps to Follow Before Turning on Your Heater
On the first cold fall or winter day, people will turn their furnaces on for the first time this heating season. It is not uncommon for people to experience different problems because their heating systems have sat unused since spring. When there are problems, phones will ring off the hook at our heater repair company the following day for emergency repair service.
Long before you need to fire up the furnace, it is a good idea to do your own DIY heater check to make sure everything is in proper working order. Discovering problems before you need to keep your home warm and the cold out not only will make it easier to get a repair technician, but also avoids those emergency service calls.

Step 1:
Change Your Air Filters
Proper air filtration is essential to keep the furnace running correctly. If the air filters are dirty and clogged, it causes your furnace to work harder to heat your home. This can lead to premature aging, overheating, and system failure.
Depending on the type of heating system installed in your home, you could have multiple air filters to replace. The most common one is the filter used on the return air vent—that big air vent in your home. The second type of filter some heating systems have is right on the furnace. It can be on the front or side of the unit.

You should use high-quality filters that are the right size for your system. It can be confusing deciding what MERV rating to use or what level of filtration you require. Keep in mind, some so-called “high-end” filters could be more damaging to your heating system because they are not porous enough to allow proper airflow and can cause your furnace to overheat.
If you are not sure what filters you require, call your home heater repair technicians for advice and their recommendations. You can also have them come out and replace the filters for you if you are not sure how to do this yourself.
Step 2:
Clean Around the Furnace
You need to make sure there is nothing stacked next to or near the furnace. If there is, it is a fire hazard and could result in a home fire. Keep the space around your furnace clear of boxes, totes, flammable objects, brooms, mops, and so on.
You should also clean the floor around the furnace. Sweep and mop it to remove dust and dirt that could get sucked into the unit. You can also dust off the entire unit, including the tops and sides. Just be careful to not pull on any wiring or venting.
If you have a heat pump that is outside your home, make sure all leaves, branches, and other debris are removed. Trim back any shrubs so there are at least five feet of clearance on the sides and front of the unit. If tree branches are hanging above the unit, trim those back, too.
Step 3:
Check Carbon Monoxide Detectors to Make Sure They Are Working
Change the batteries in each detector in your home. This is also a great time to change the batteries in all the smoke detectors. If you do not have a carbon monoxide detector in the home, you should get one installed for any type of fuel-burning heating system.

Step 4:
Verify the Pilot Light Is Lit on Natural Gas Heaters
There should be an access door on your furnace you can open to see if the pilot is lit. Some people will shut off the natural gas line to the furnace at the end of the heating season to save money. If you do, remember to turn it back on, and light the pilot.
If you did not shut off the gas and do not see the pilot lit, turn off the gas immediately. DO NOT attempt to light the pilot, as gas has been filling the area in and around the furnace. You want to ventilate the room, first, and wait several hours for the gas to clear before lighting the pilot light.
If the pilot is on, you are ready to move on to the next step. If the pilot will not light or will not stay lit, then turn off the gas and call a professional heater repair technician right away.
Step 5:
Do a Pre-season Heater System Check
Once you have completed the previous four steps, you want to do a system check. Turn on the furnace and let it run a complete cycle. While it is running, listen to the sounds the unit makes. Does the blower fan sound louder or is it making squealing or squeaky sounds? Is there any unusual clanking or banging coming from the unit?
If something seems wrong, shut off the furnace and call a professional repair technician for assistance. Unusual noises, clanking, and banging indicate a problem that needs to be fixed. For instance, the blower motor belt could be loose or the fan blades could be unbalanced.

Step 6:
What Is That Burning Smell Coming From My Furnace?
Dust can accumulate inside the furnace and ductwork in the home when the furnace is not in use. When you fire it up for the first time during the pre-check, you may notice a burning smell. This is normal and should dissipate after one or two full cycles. If not, then there can be a bigger problem with the heating system that needs to be repaired. Shut it off and call a professional.
Step 7:
Have a Home Heating Technician Give Your Furnace a Tune-up
Scheduling an annual tune-up before the start of the heating season ensures everything is in working order. Your technician performs numerous system checks and a complete inspection and makes any necessary repairs needed to keep you warm all winter long. Plus, you can avoid emergency breakdowns on those cold winter days.

Other Home Heating Considerations to Help Keep You Warm
Aside from verifying your furnace is going to work correctly, there are other things you can do to stay warm throughout the winter and maintain the indoor air quality of your home.
- Have your ducts been cleaned? If you notice your home seems very dusty, and dust accumulates quickly, chances are the ducts need to be cleaned. Dust can reduce air quality and cause allergies and other problems. In some cases, your ductwork could have leaks and is drawing in dirt and dust into the system. Plus, excessive dust requires more frequent air filter changes.
- Check for cold air leaks around doors and windows. You can check for these by placing your hand near the window or door and slowly moving it around the perimeter. On windows, also check the seal where the windows close. If you notice a change in air temperature or if you can feel air drafts around windows and doors when they are closed, there are air leaks.
- TIP: You can seal air leaks by recaulking around doors or windows, installing new weather stripping, or putting up plastic insulation over windows. For doors, you can roll up a thick towel and place this at the bottom of the door to stop cold air from coming into the home from under the door.
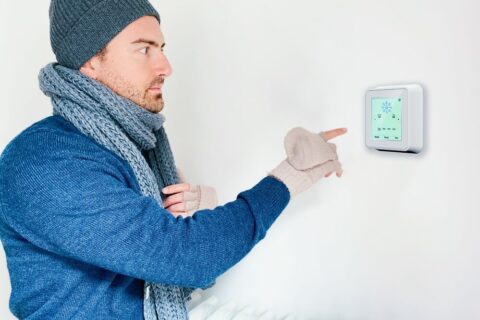
- Upgrade your thermostat to an energy-saving model. Modern thermostats have programmable features where you can set different temperatures for various times of the day or days of the week. For instance, you can have it adjust the temperature down a few degrees during the day when everyone is gone. It will then automatically adjust it back up just before you get home so you come home to a warm house.

- Get a humidifier and humidistat installed. In the winter months, the air is drier with little humidity. Maintaining humidity inside the home is healthier and improves indoor air quality. There are stand-alone units, as well as models that can be connected to your furnace to add humidity to the heated air. Humidistats are similar to thermostats but, instead of controlling temperatures, they control the humidity level.

Getting your home ready for the colder winter months is something you should do now. If you wait, you could wake up to a cold home on the coldest day of the season.
For assistance in ensuring your home’s heating system is functioning correctly and optimally, or to schedule a furnace tune-up with one of our heater repair technicians, please feel free to contact Barstow and Sons at
(410) 777-9185 today!


